

INFOGRAPHIC: Portable Toilet Special Features You Might Not Know About
August 4, 2017
Creating and Maintaining a Brand
August 5, 2017
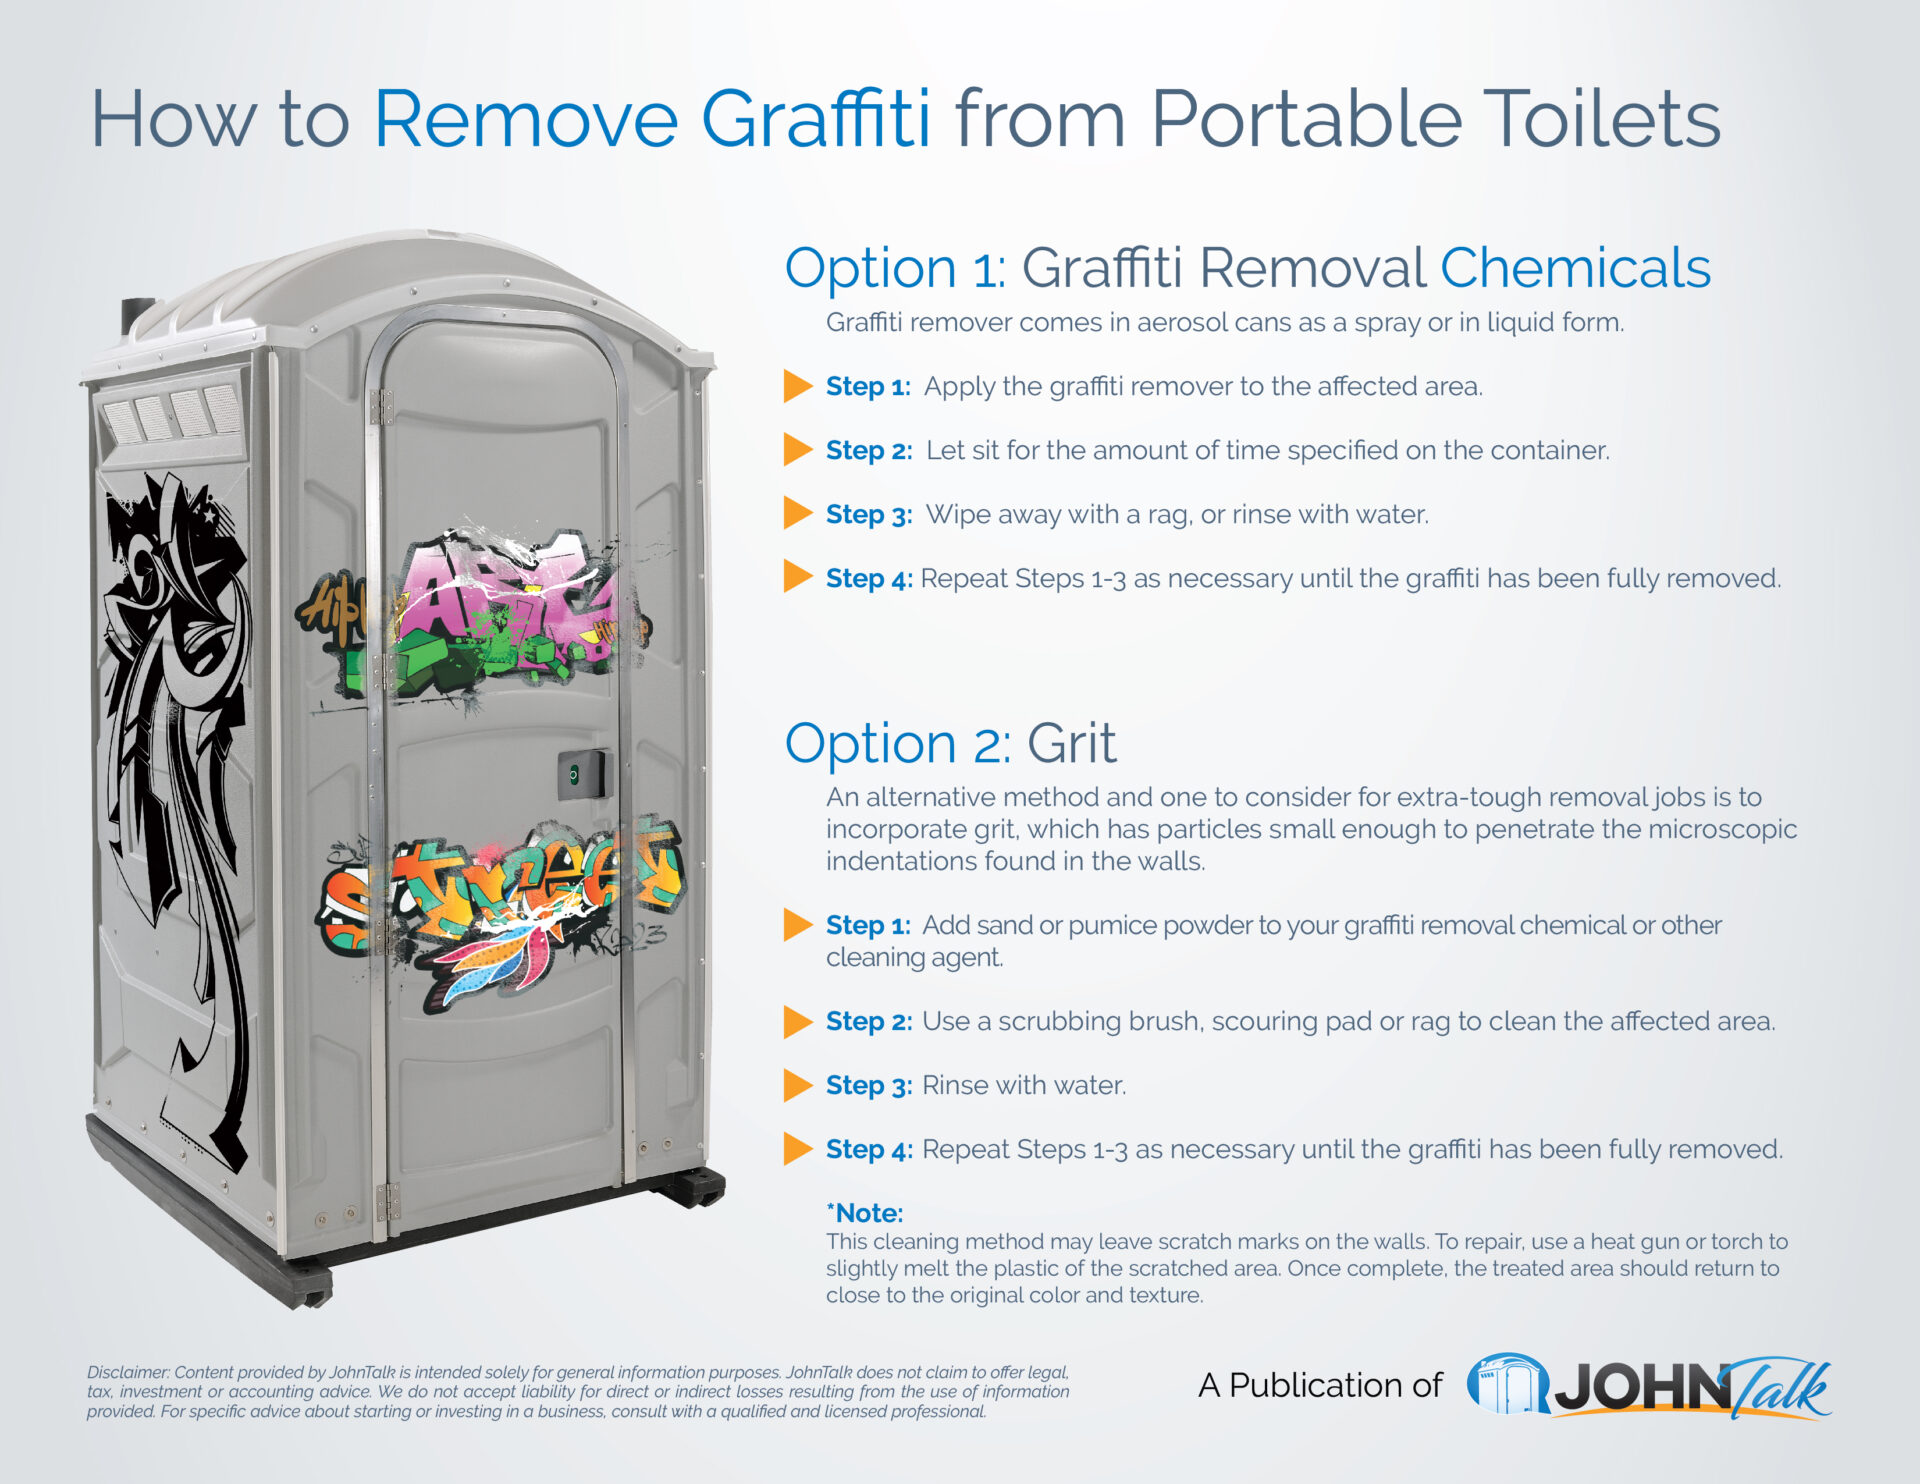
It’s likely that one or more of your portable toilets will be the target of vandals at some point. If you are unfortunate enough to find a unit that has been tagged with graffiti, don’t panic. You do have options to remove the graffiti so you don’t have to replace the unit or leave the unsightly paint.
Like this infographic? Share it with your friends and colleagues!
Get the JohnTalk “ALL-ACCESS PASS” & become a member for FREE!
Benefits Include: Subscription to JohnTalk Digital & Print Newsletters • JohnTalk Vault In-Depth Content • Full Access to the JohnTalk Classifieds & Ask a PRO Forum
Looking to Take Your Portable Restroom Business to the NEXT LEVEL? Download our FREE Guide: “Your Guide to Operating A Portable Restroom Business.”
Thinking About GETTING INTO the Portable Restroom Industry? Download our FREE Guide: “Your Guide to Starting A Portable Restroom Business.”
How to Remove Graffiti from Portable Toilets
Option 1: Graffiti Removal Chemicals
Graffiti remover comes in aerosol cans as a spray or in liquid form.
Step 1: Apply the graffiti remover to the affected area.
Step 2: Let sit for the amount of time specified on the container.
Step 3: Wipe away with a rag, or rinse with water.
Step 4: Repeat Steps 1-3 as necessary until the graffiti has been fully removed.
Option 2: Grit
An alternative method and one to consider for extra-tough removal jobs is to incorporate grit, which has particles small enough to penetrate the microscopic indentations found in the walls.
Step 1: Add sand or pumice powder to your graffiti removal chemical or other cleaning agent.
Step 2: Use a scrubbing brush to clean the affected area.
Step 3: Rinse with water.
Step 4: Repeat Steps 1-3 as necessary until the graffiti has been fully removed
* Note: This cleaning method may leave scratch marks on the walls. To repair, use a heat gun or torch to slightly melt the plastic of the scratched area. Once complete, the treated area should return to close to the original color and texture.

